Trauma Stabilization
Ribbond is perhaps best known for making periodontal splints. Ribbond splints are strong, highly bondable and esthetic. A Ribbond splint takes less time than traditional methods, is more esthetic, less bulky and exceptionally failure resistant.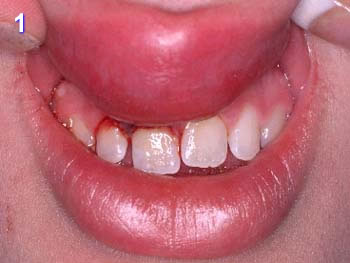
Technique
Step 1
Gently reposition the avulsed or luxated tooth.
Step 2
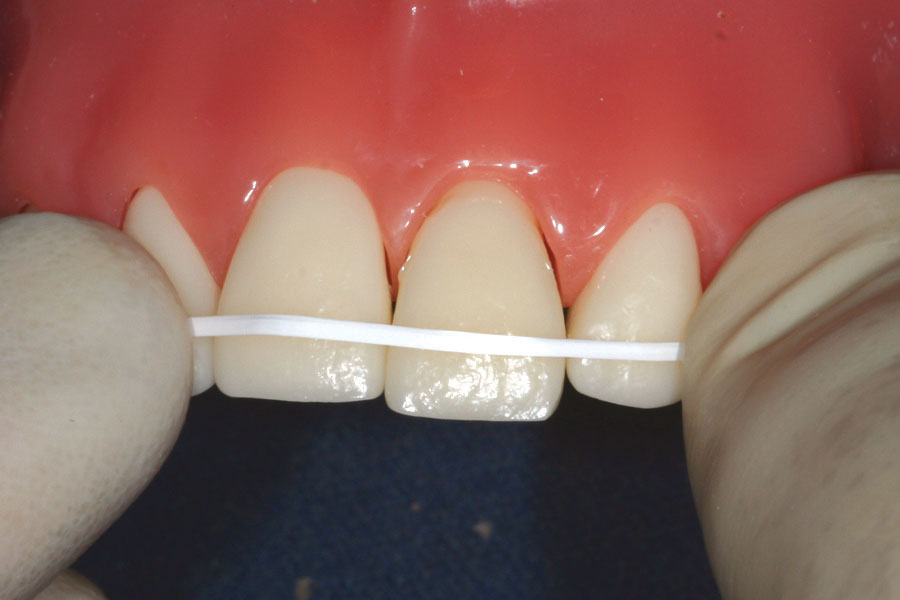
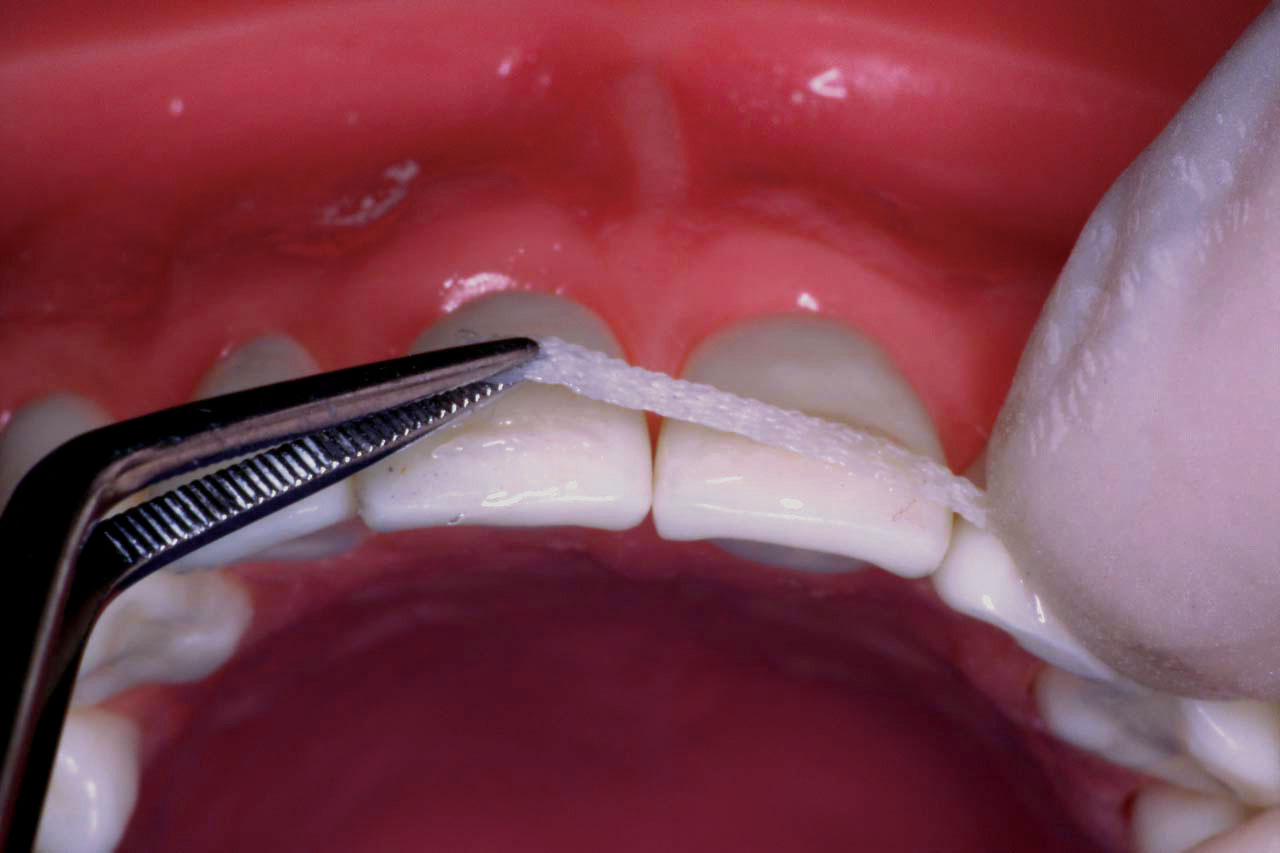
Measure the length of Ribbond needed with dental floss. The Ribbond should extend to 3/4 of the distance across the abutments at the level of interproximal contacts.
Step 3
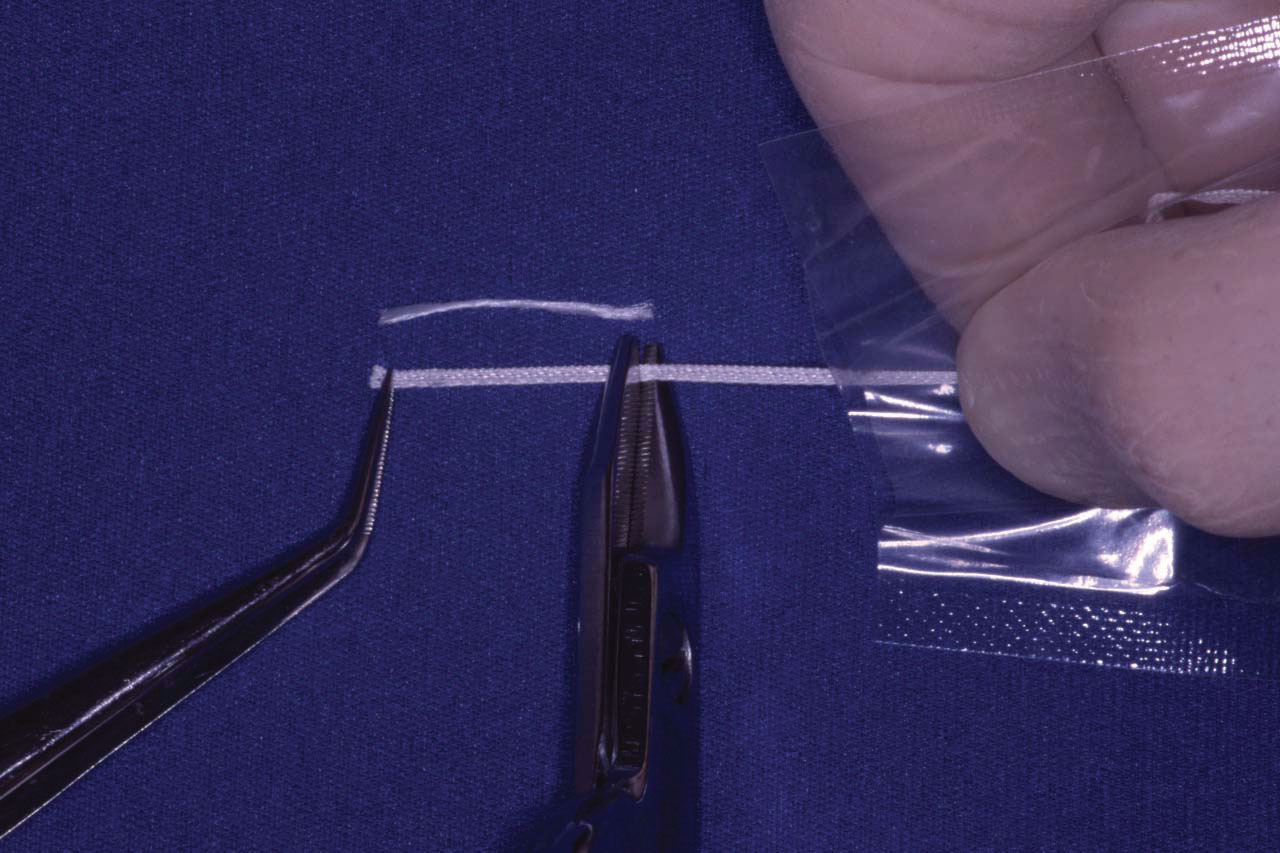
Remove the Ribbond from the protective plastic sleeve with cotton pliers. Cut the Ribbond to the length of the dental floss template.
Step 4
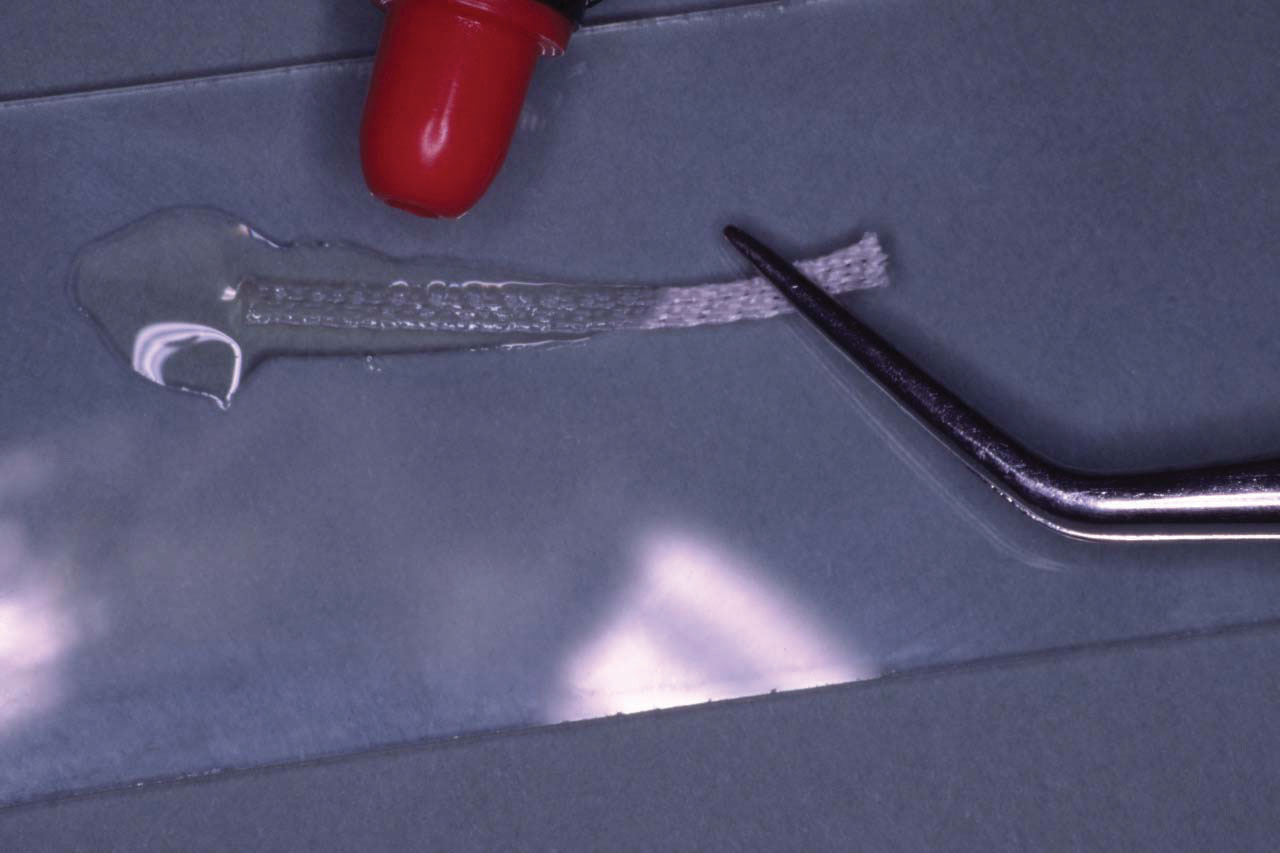
Wet the Ribbond with unfilled bonding adhesive or pit and fissure sealant. Blot off the excess with a lint free gauze or patient bib. The Ribbond may now be touched with powder free gloves or clean fingers.
Step 5
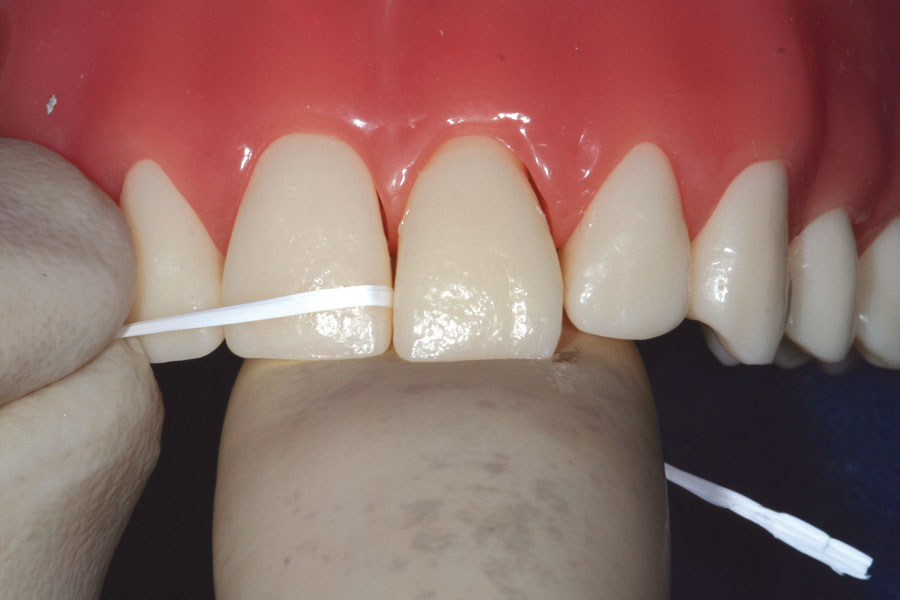
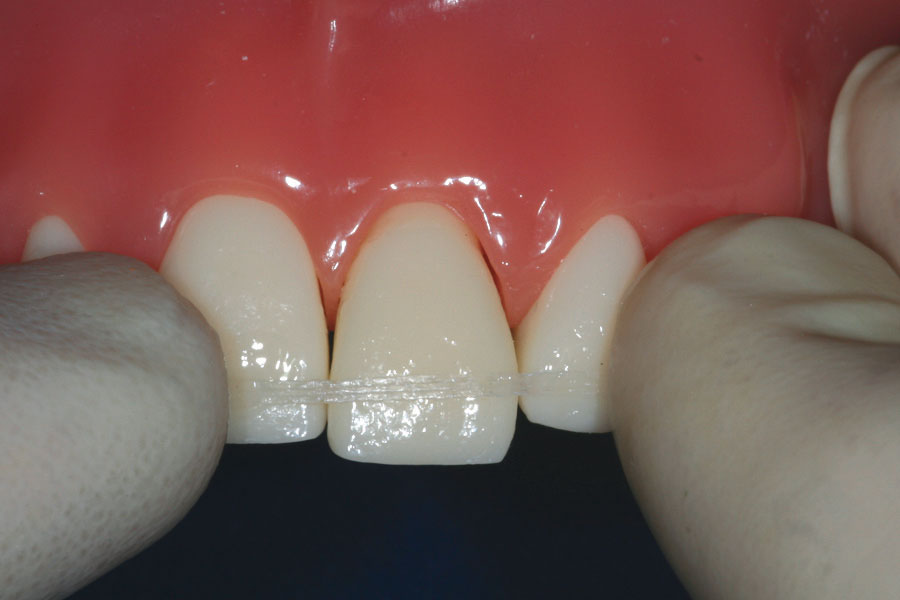
Use waxed dental floss to contaminate the interproximal contacts of both the abutments and the traumatized tooth. This will prevent composite from bonding at the contacts.
Step 6
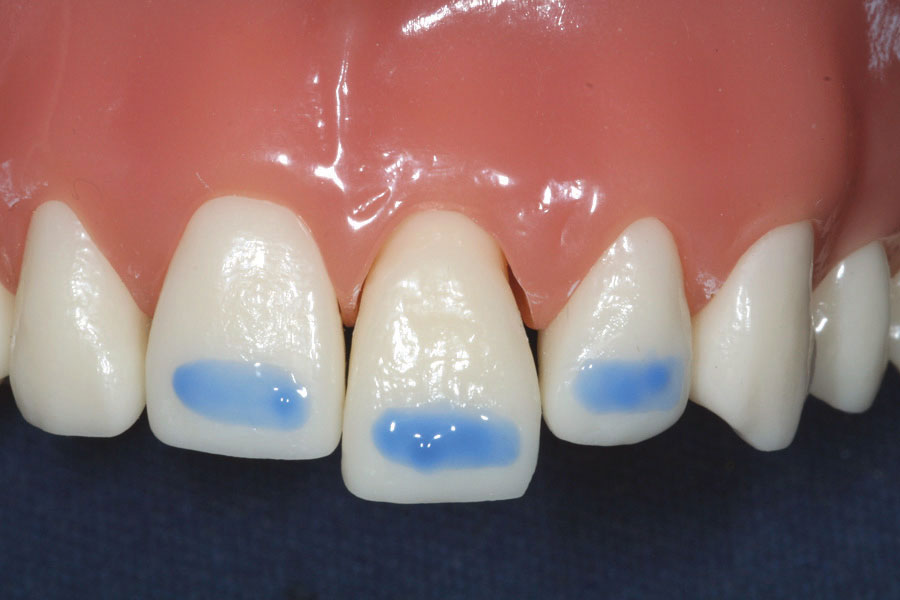
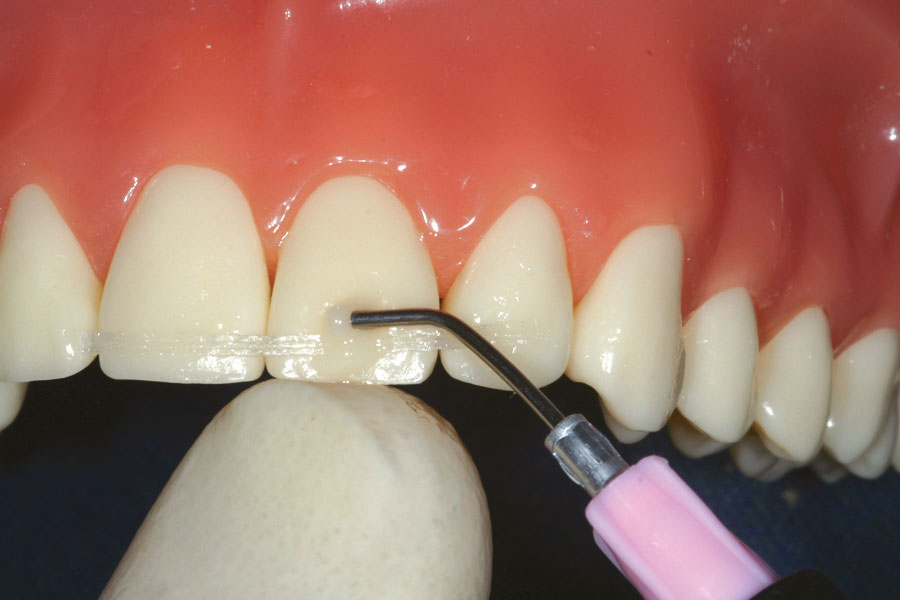
Clean and etch the teeth at the level of the interproximal contacts. To maximize ease of removal, etch only enough surface area necessary for retention. Apply a bonding resin and cure. To insure semi-rigidity, do not etch or bond in the interproximal region.
Step 7
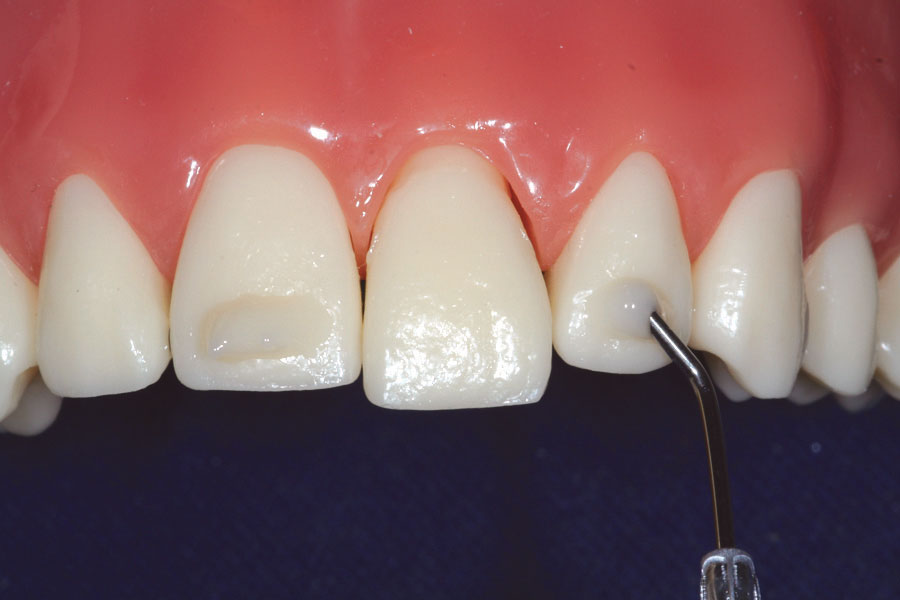
Apply a minimal amount of filled composite on the teeth. Do not place any composite at the contacts.
Step 8
Press the Ribbond through the composite against the teeth. Maintain Ribbond taut in interproximal region. Do not allow composite in the interproximal region during placement of the Ribbond. Cure.
Step 9
Reposition traumatized tooth and apply composite. Reposition traumatized tooth with your finger, and hold it in position as you attach the Ribbond to the traumatized tooth with composite. Press the Ribbond closely against the tooth and cure. Be sure to get no composite in interproximal region.
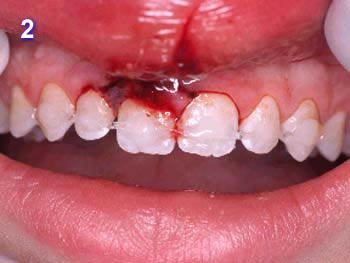
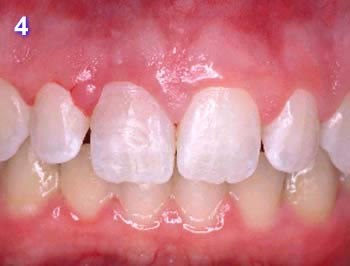
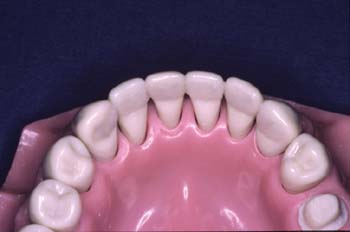
Step 10

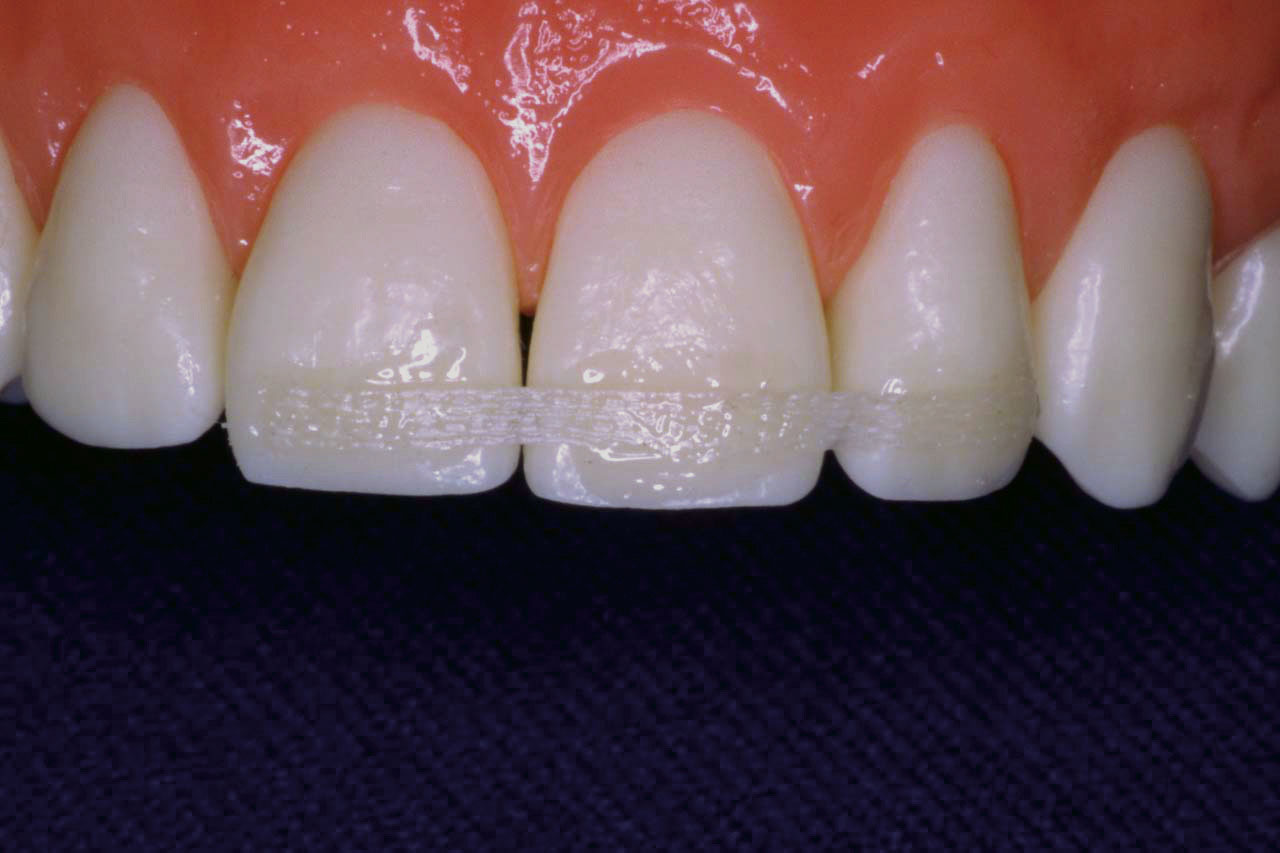
Completed truma splint. The finished splint is esthetic, thin, smooth, and non-irritating to the injured lip.
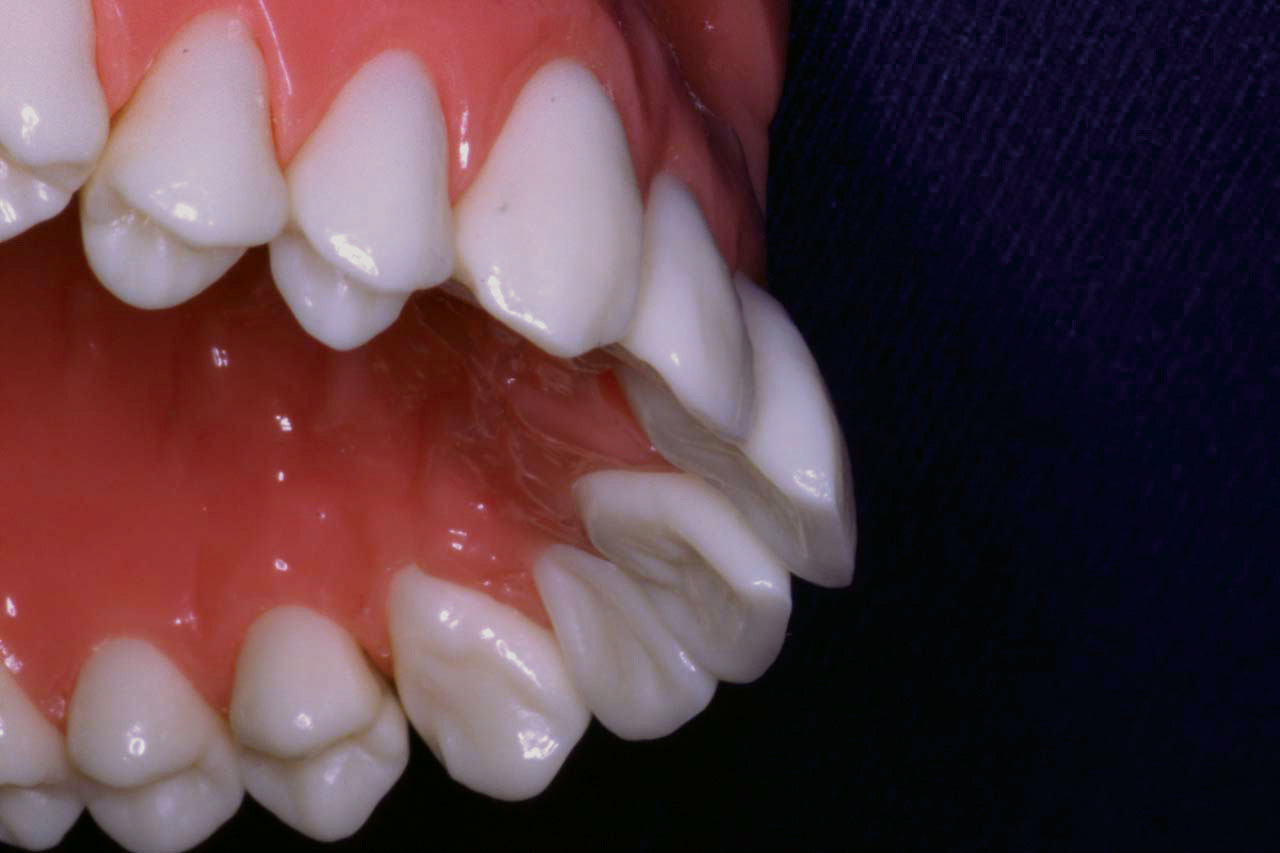
Step 11
Check occlusion, finish and polish. Remove excess composite and polish with a composite-resin polishing paste.
Ribbond does not polish well.
Do not cut into Ribbond fibers.The finished splint is thin, comfortable and esthetic.