
Fiber Reinforced Composite Restoration
Ribbond reinforces structurally compromised teeth. Studies show that Ribbond mitigates the harmful effect of C-factor. Shrinkage of the composite against the tooth is dramatically reduced preventing gap formation, leakage, and sensitivity. See this study: “Effects of fiber reinforcement on adaptation and bond strength of a bulk-fill composite in deep preparations”
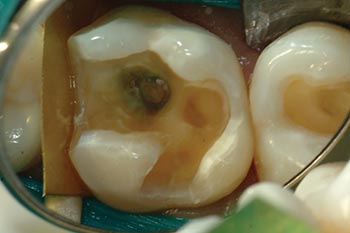
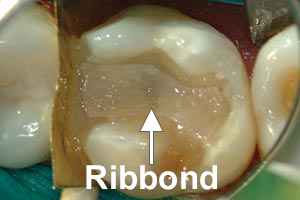
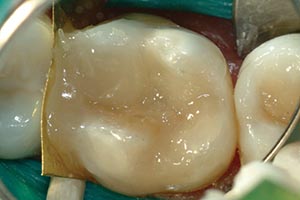
Photos courtesy of: Wendell Robertson, D.D.S.
Watch the Video
This video shows a large composite restoration reinforced with Ribbond. This is an alternative to a crown.
Dr. Grant Chyz "composite-to-fiber" technique
Many dentists find the Dr. Grant Chyz technique easier for making a Ribbond composite restoration. Instead of placing a filled composite onto the tooth and then placing the wetted Ribbond into that composite, which is the traditional way to place the Ribbond, Dr. Chyz presses the wetted Ribbond into an uncured pad of a viscous filled composite outside of the mouth and then lifts that Ribbond-composite piece off of the mixing pad so that there is approximately 0.5mm of filled composite underneath the Ribbond. The Ribbond-composite piece is then placed into the cavity with the composite side of this piece being placed against the tooth surfaces.


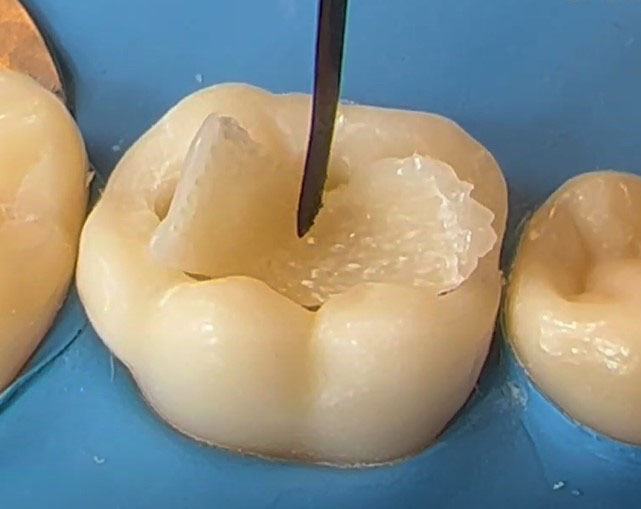
After making the Ribbond-composite piece, place the Ribbond into the tooth with the composite side of the Ribbond-composite piece against the tooth. Press the Ribbond through the composite so it is as close to the tooth surfaces as possible. NOTE: With the Dr. Chyz technique, a flowable composite is not placed on the tooth as it is using the traditional Ribbond composite restoration technique.
Technique
Step 1
Make preparation. Round the internal line angles and recontour the cavity walls to eliminate gross irregularities in the internal surfaces.
Step 2
Measure and cut amount of Ribbond needed. Ideally one Ribbond piece will cover the pulpal floor and partially cover the B, L, M, D, walls of the cavity. For deep preparations in which one piece of Ribbond cannot cover most of the internal cavity surfaces, add one or two additional pieces of Ribbond to encircle the cavity walls
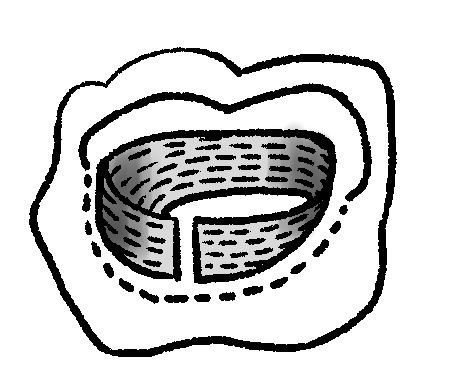
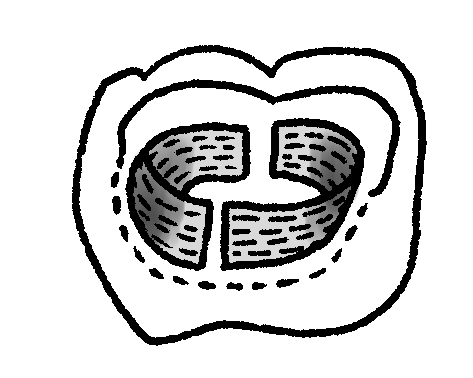
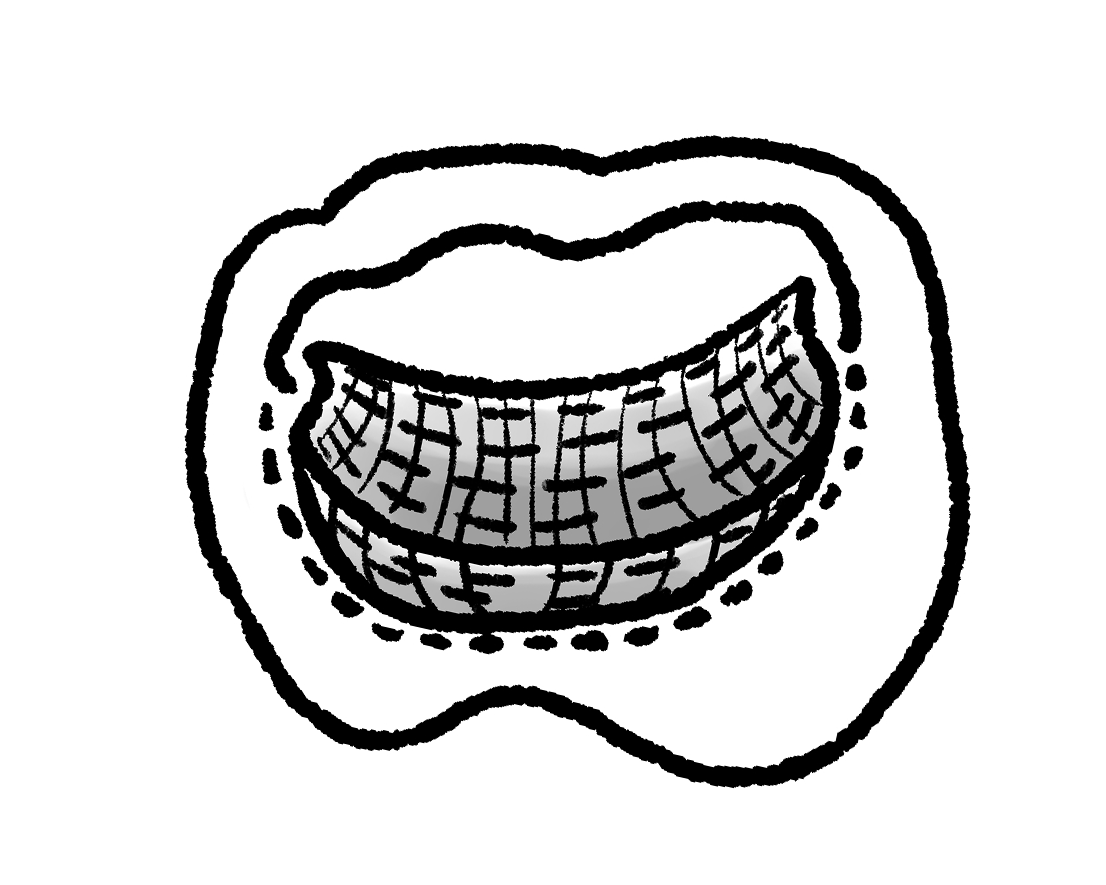
Step 3
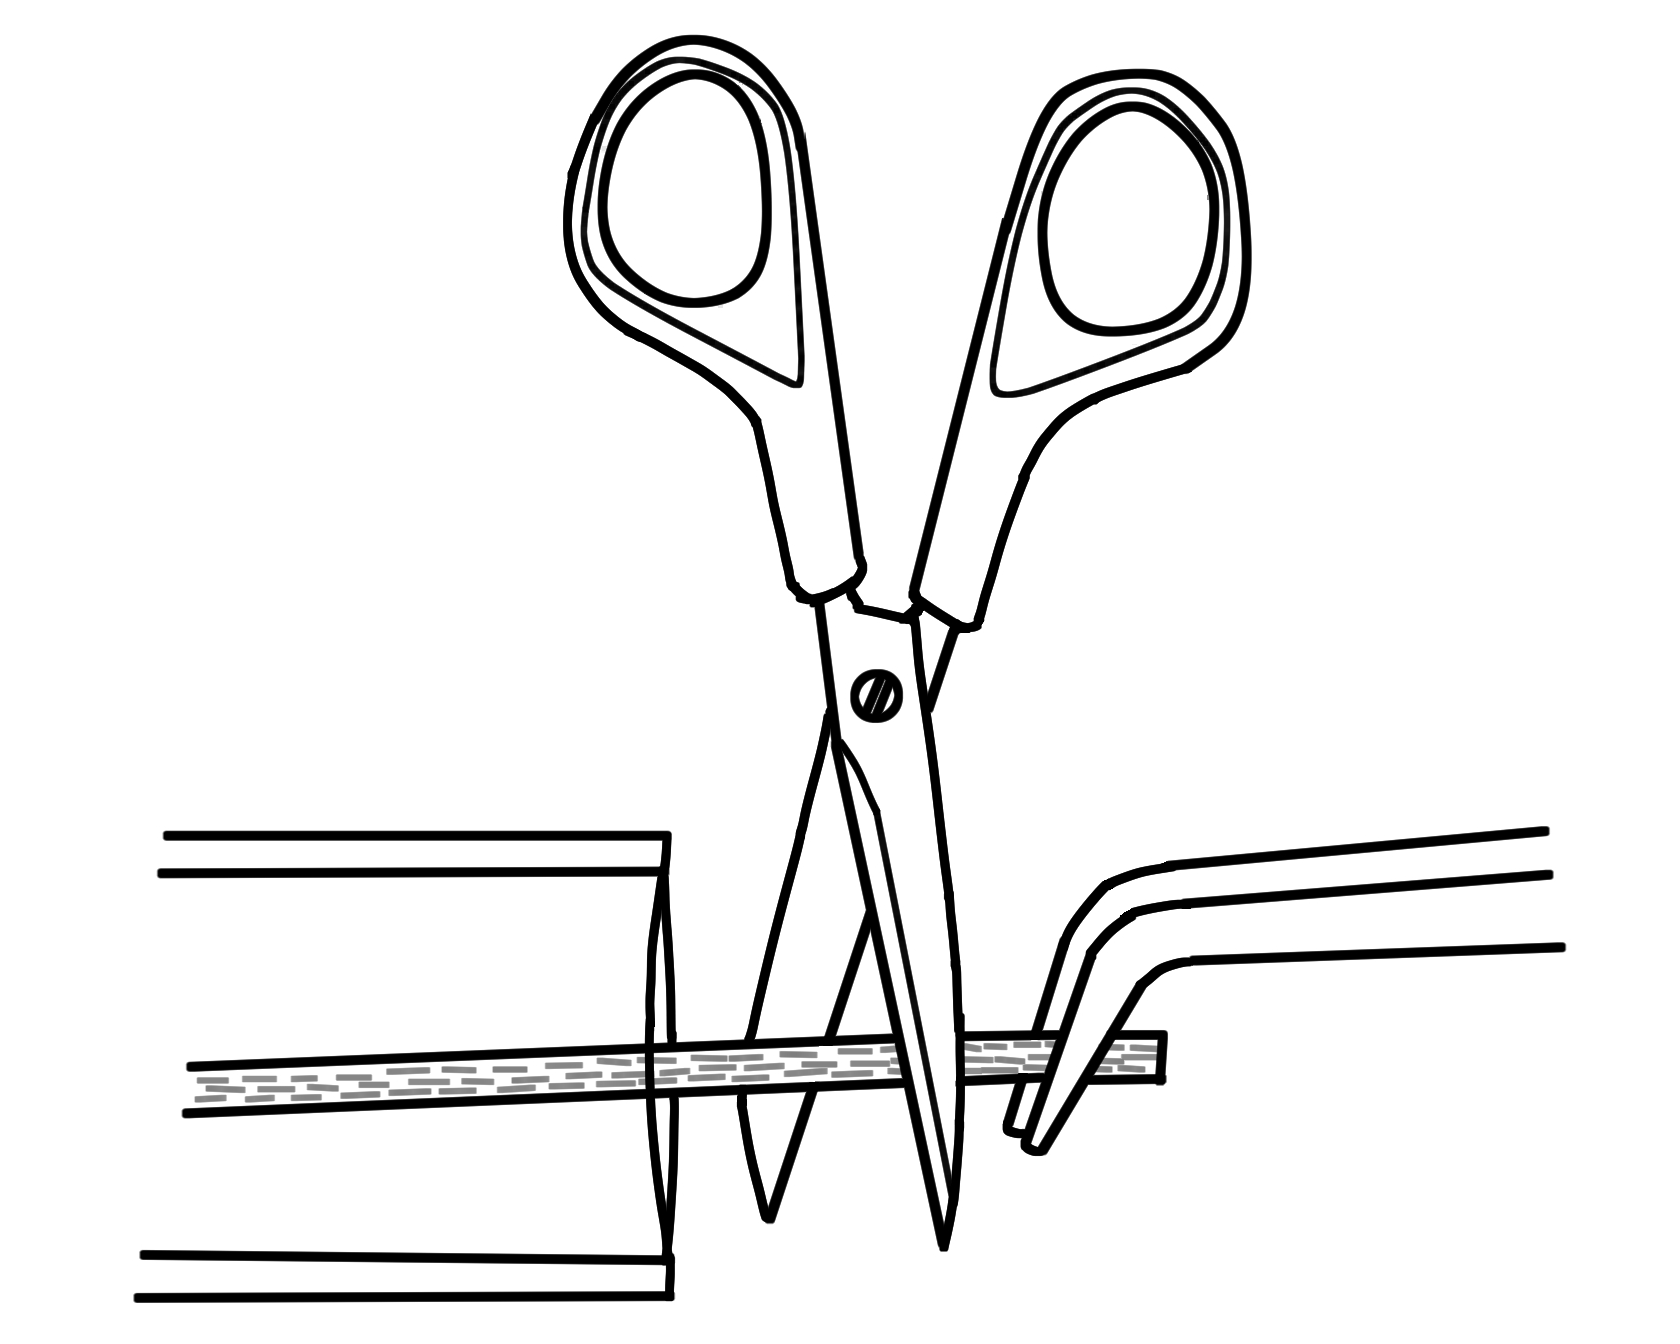
Cut the Ribbond. To prevent small pieces of Ribbond from springing away when cutting, hold the Ribbond with metal pliers.
Step 4
Prepare cavity for bonding and apply bonding resin. Use your preferred bonding adhesives and preferred techniques to bond to the tooth. Cure.
Step 5
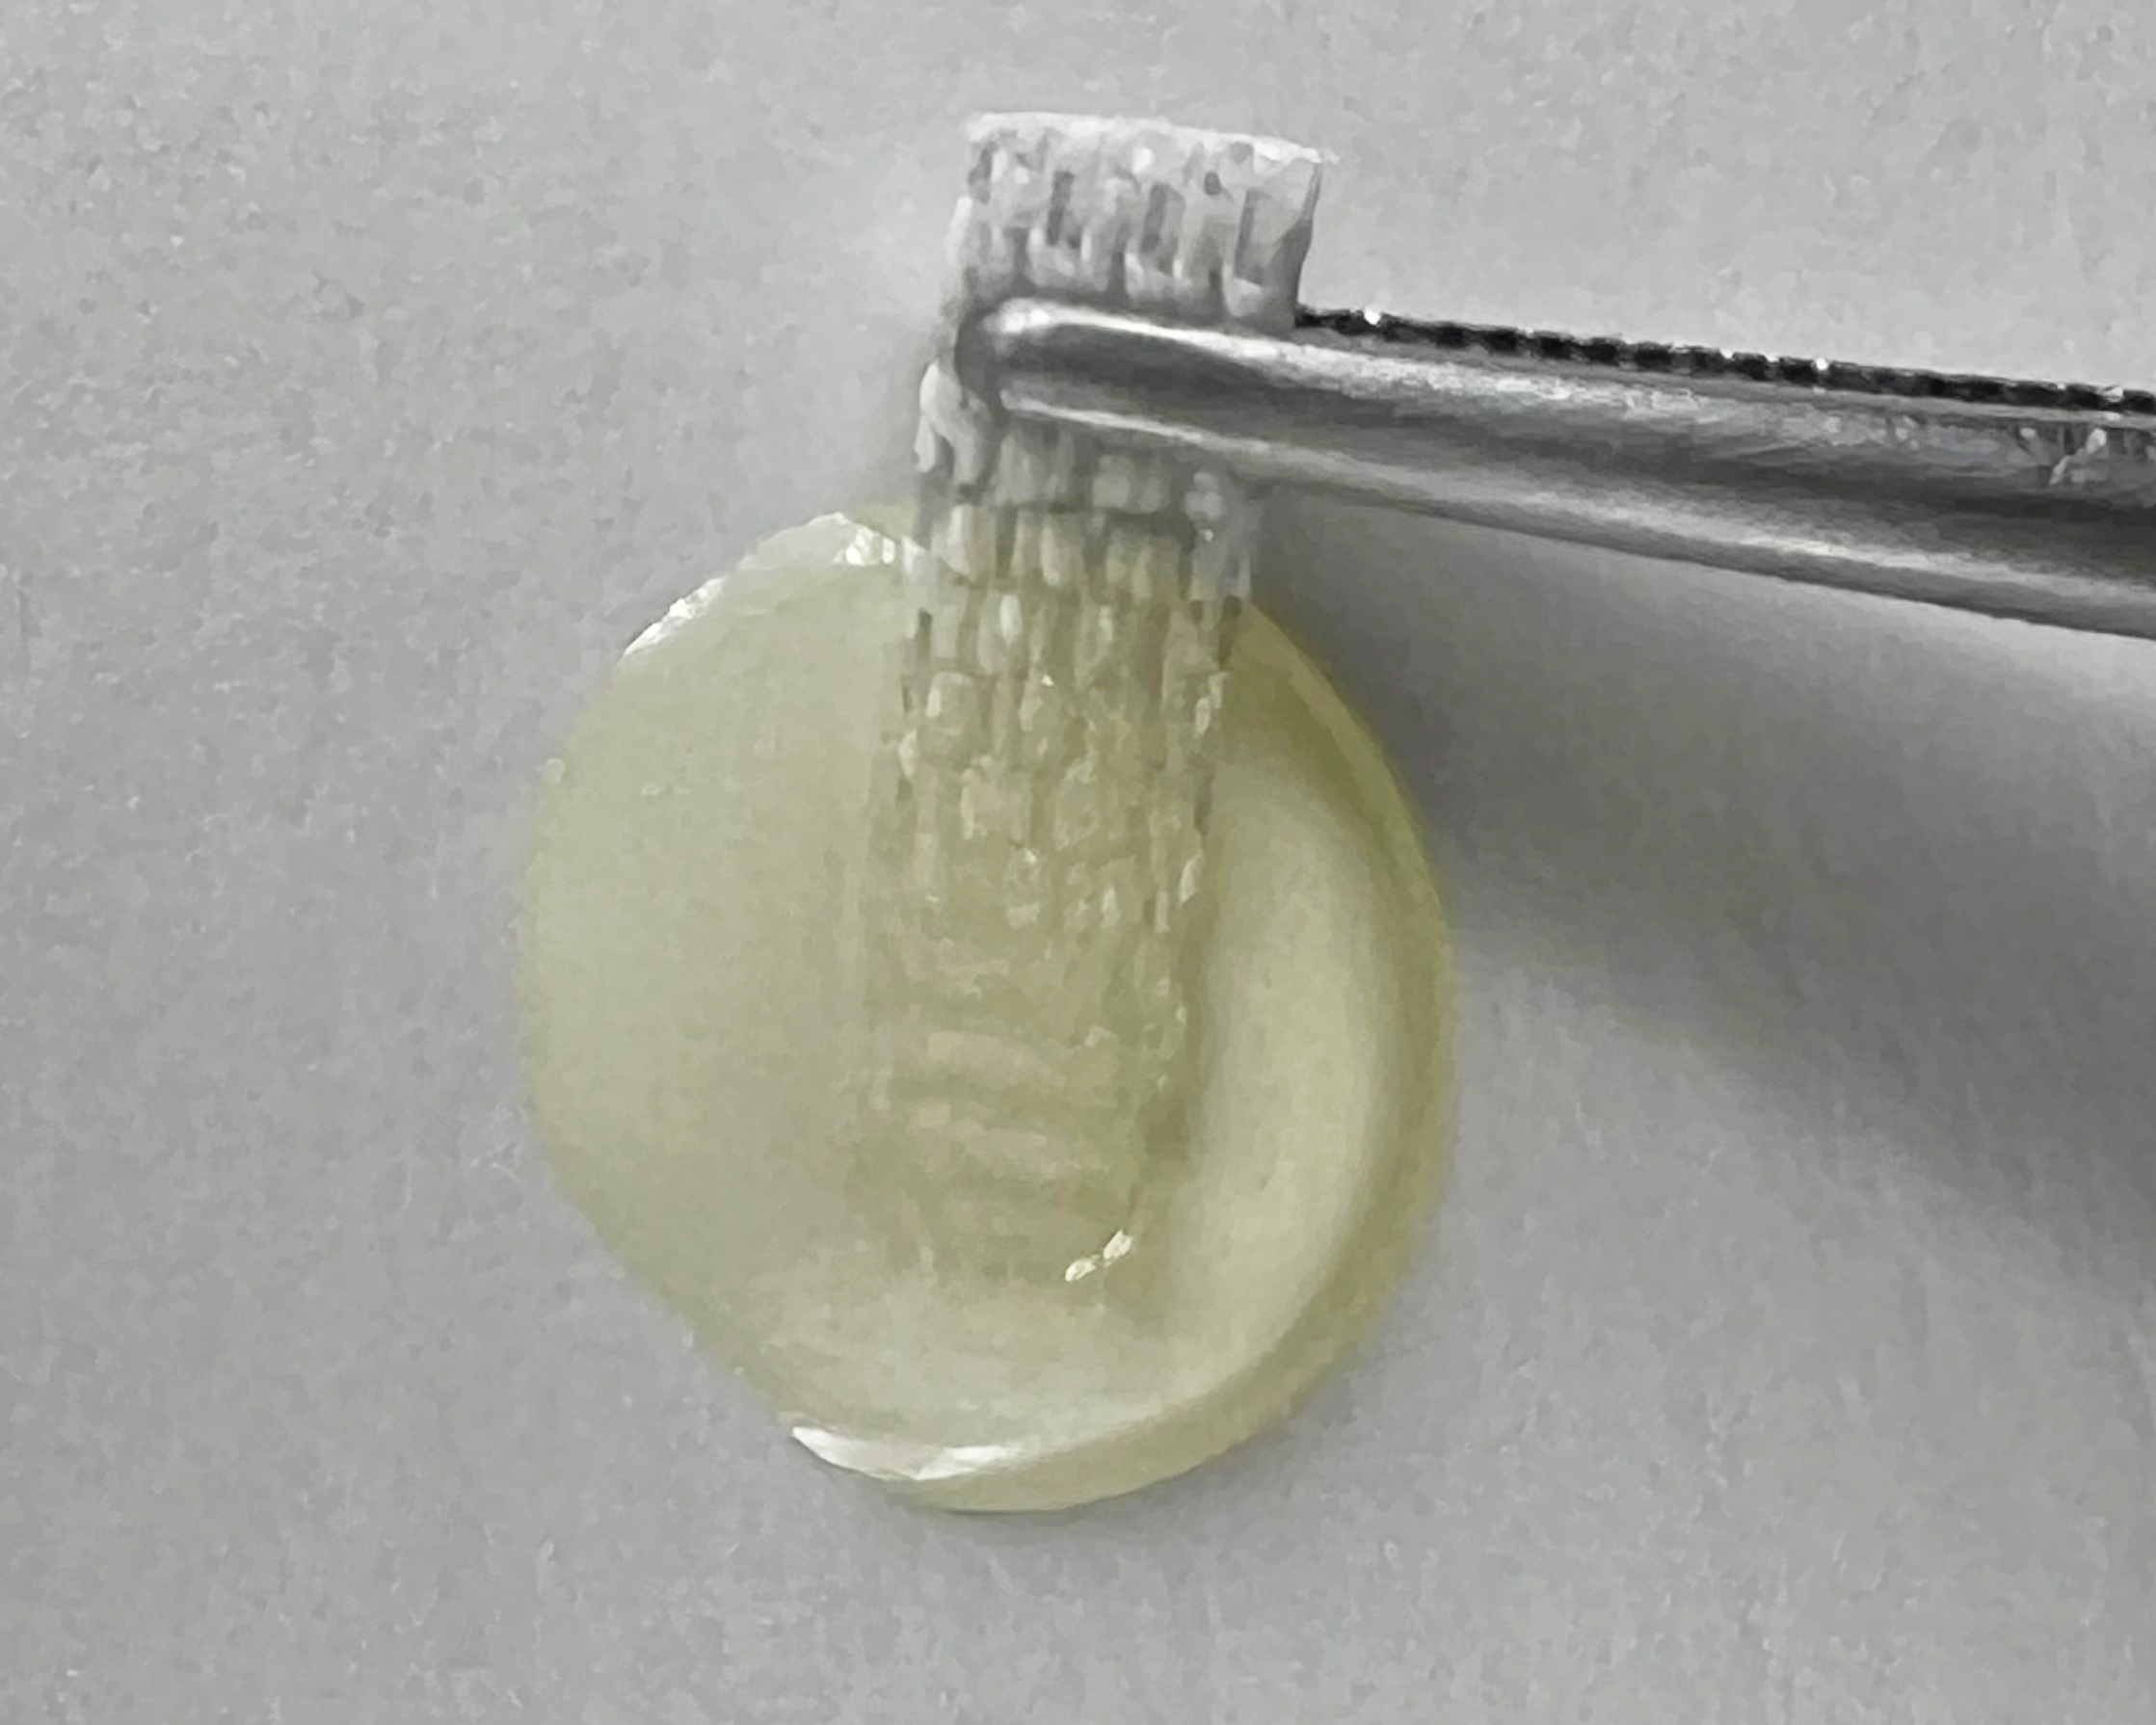
Wet the Ribbond with resin. Thoroughly wet the Ribbond with Ribbond Wetting Resin or an unfilled bonding adhesive. Lightly massage the resin into the fibers with an instrument. Do not cure yet.
Step 6
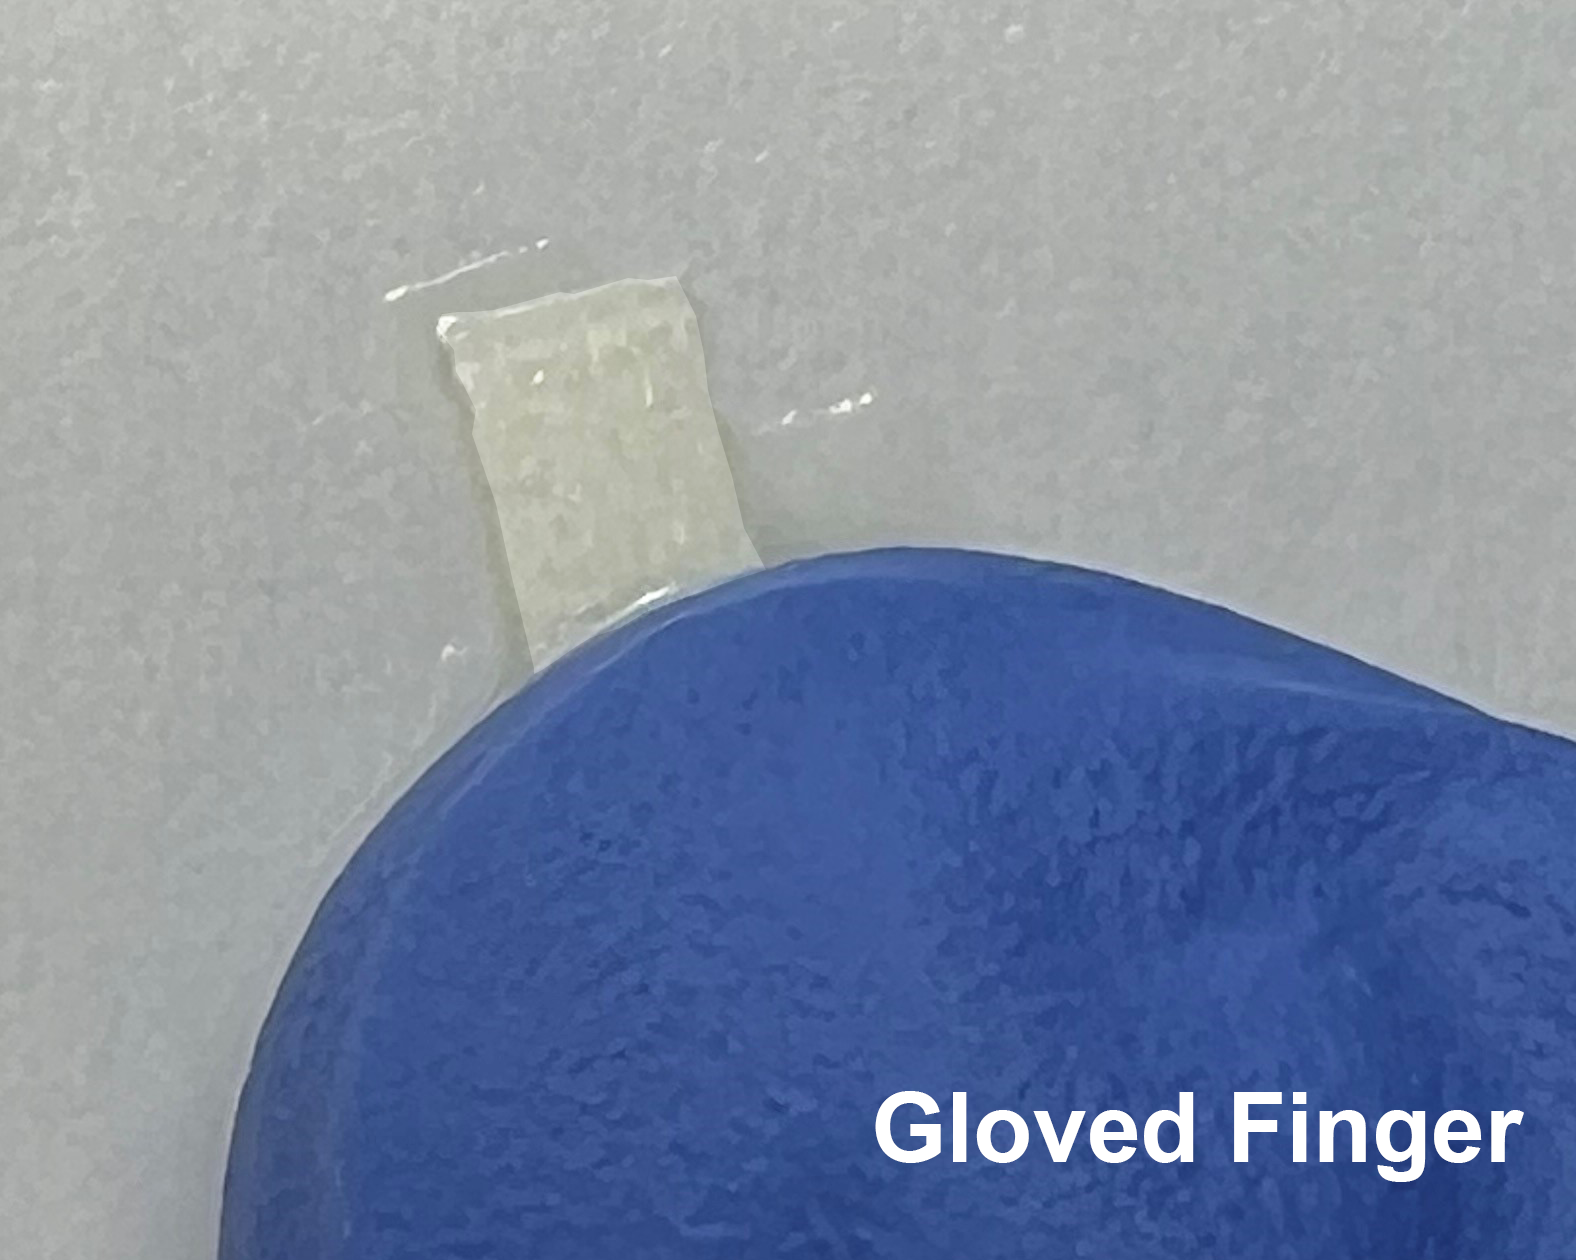
Remove the excess resin from the wetted Ribbond. Move the wetted Ribbond to a dry area on the mixing pad and gently dab a gloved finger against the Ribbond to remove excess resin. The Ribbond should remain thoroughly wetted but not “dripping wet”.
Step 7
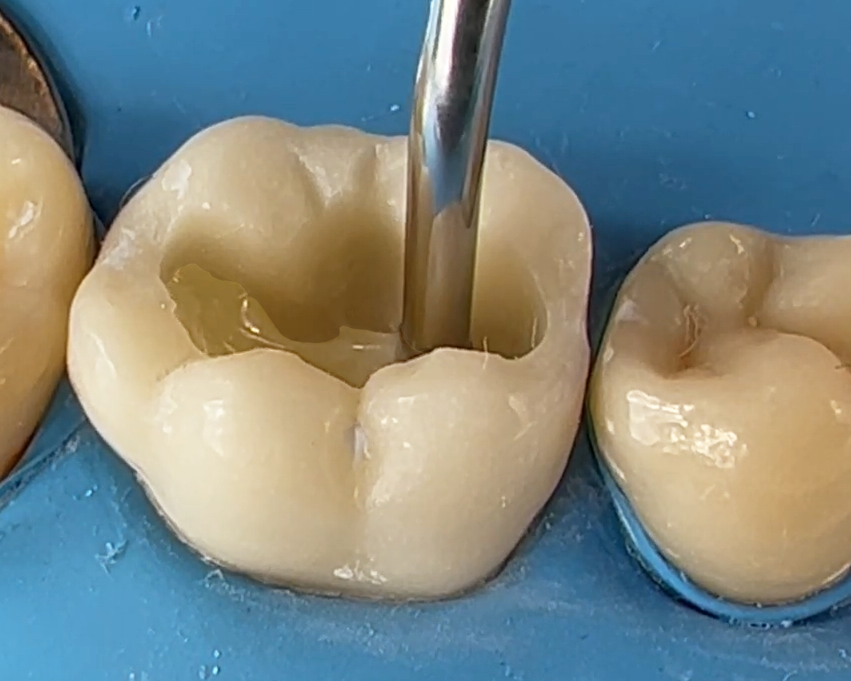
Apply a thin 0.5 mm thick layer of a tacky/viscous flowable composite (such as the Ribbond Securing Composite) on the pulpal floor and on the cavity walls where the Ribbond will be placed. Do not cure yet.
Step 8
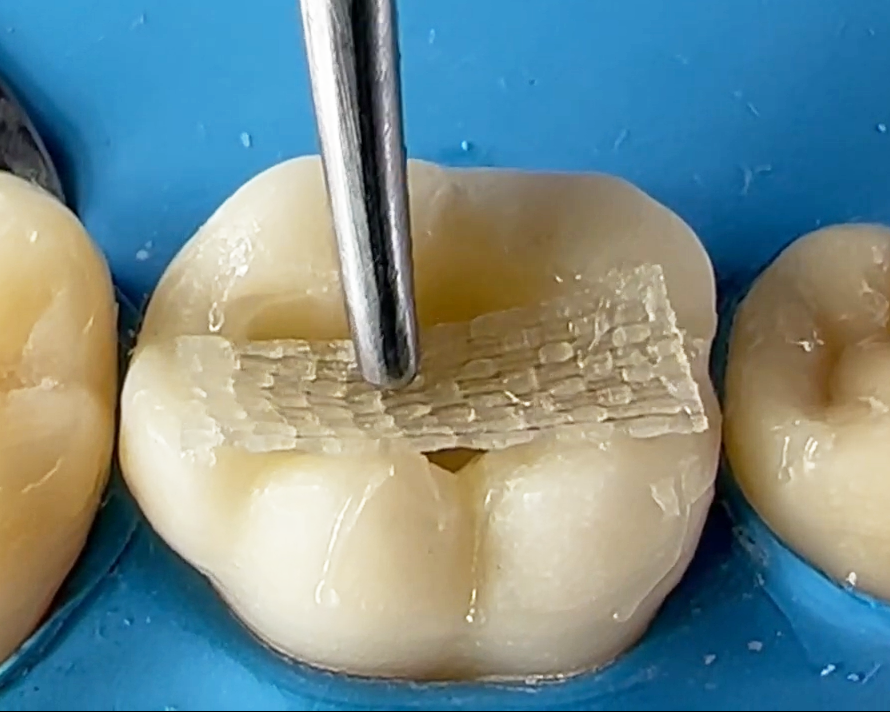
Place the wetted Ribbond into the uncured tacky flowable composite that was placed into the preparation. Press the Ribbond through the composite so that it is closely bonded against the tooth.
Step 9
Cure. Light cure after placing all of the Ribbond pieces.
Step 10
Finish the restoration. Incrementally place composite using your preferred composite technique and complete the restoration.
Here are two presentations by Dr. Graeme Milicich presented at the Academy of Biomimetics annual meetings.
- A Ribbond-direct Composite on an Endo premolar
- A technique discussion on Ribbond cores for premolars and molars
Why and how Ribbond composite restorations work
Published research articles (examples below) found that incorporating Ribbond into composite restorations provides the following benefits:
-
INCREASED MICRO-TENSILE BOND STRENGTH
The micro-tensile bond strength of the composite is significantly increased when Ribbond is closely adapted and bonded against the cavity walls. -
MITIGATING THE HARMFUL EFFECT OF C-FACTOR
The increased micro-tensile bond strengths decreases the negative c-factor effects. This phenomenon is especially evident with deep and narrow Class I restorations.
-
MINIMIZES POLYMERIZATION AND DECREASES SHRINKAGE AND LEAKAGE
Polymerization shrinkage can result in leakage, and sensitivity. Closely lining the preparation with Ribbond significantly reduces and minimizes these harmful effects of polymerization shrinkage. Because the Ribbond is closely adapted to the cavity walls, there is less volume of composite to shrink and less polymerization shrinkage results in less leakage and less sensitivity.
-
BRIDGING CRACKS ON PULPAL FLOOR
Ribbond bridges the cracks that are commonly seen in the pulpal floor of old amalgam restorations. Ribbond acts like staples across the cracks and may hold the parts of the tooth on both sides of the crack together.
-
RELIEVES CAUSES OF SYMPTOMS OF SPLIT TOOTH SYNDROME
Split tooth syndrome has been successfully relieved when Ribbond has been used as a buccal-lingual cross cusp splint under the occlusal surface to bridge cracks. The cross cusp Ribbond splint prevents the parts of the split tooth from moving.
-
INCREASED FRACTURE TOUGHNESS
Ribbond fiber reinforcements greatly increases the fracture toughness of dental composite restorations. Ribbond’s unique combinations of fixed nodal intersections and tough ultra-high molecular weight polyethylene fibers inhibits and prevents crack propagation it composite resin.
-
STRESS DISTRIBUTION AND ENERGY ABSORPTION MECHANISM
Ribbond acts as a stress distribution and energy absorption mechanism. It minimizes the stress concentrations by distributing forces over a greater area, which prevents crack formation and propagation. It also absorbs the energy from repeated occlusal impacts.
-
FAIL-SAFE DESIGN.
Studies demonstrate that if a crack starts in a Ribbond lined composite restoration, the crack is redirected. If this crack leads to failure, the restoration/tooth complex fails safely and the tooth can be retreated. In the case of standard composite restorations techniques; when the restoration/tooth complex fails, it tends to fail catastrophically and the tooth must be extracted.
The links below reference published studies supporting these performance characteristics.
-
C-Factor - Effects of fiber reinforcement on adaptation and bond strength of a bulk-fill composite in deep preparations
Watch the Video
This study compares the use of a common bulk-fill composite, placed with and without Ribbond at the cavity interface. It demonstrates that the polymerization of a bulk filled composite results in gaps at the cavity interface when used in two increments or in bulk. These interface gaps are not visible to the naked eye, but they can lead to post-operative sensitivity, leakage and recurrent decay. Other Optical Coherence Tomography (OCT) studies by the lead author have demonstrated this phenomenon with a variety of bonding agents and composites, so this is not unique to a single brand or type of composite. All composites shrink and this shrinkage causes stress that can shorten the lifespan of the restoration and contribute to bond-interface gap formation, leakage and post-operative sensitivity. When Ribbond is well adapted into the cavity, interface gaps between the restoration and the tooth are nearly eliminated! The authors suggest that the Ribbond absorbs polymerization shrinkage stress, resulting in an intact bond interface. Other studies have confirmed increased fracture strength and a resistance to catastrophic fracturing of teeth restored with laminated Ribbond. With this study, we learn that by laminating Ribbond to the internal aspect of moderate to large composite restorations, we create the additional benefit of preventing bond interface gaps.
- C-Factor - The Effect of C-factor and Flowable Resin or Fiber Use at the Interface on Microtensile Bond Strength to Dentin
- Crack bridging;
- Cross cusp splinting
- Monoblock in root canals
- Micro leakage in over-flared canals
- Additional micro-leakage photos